
")


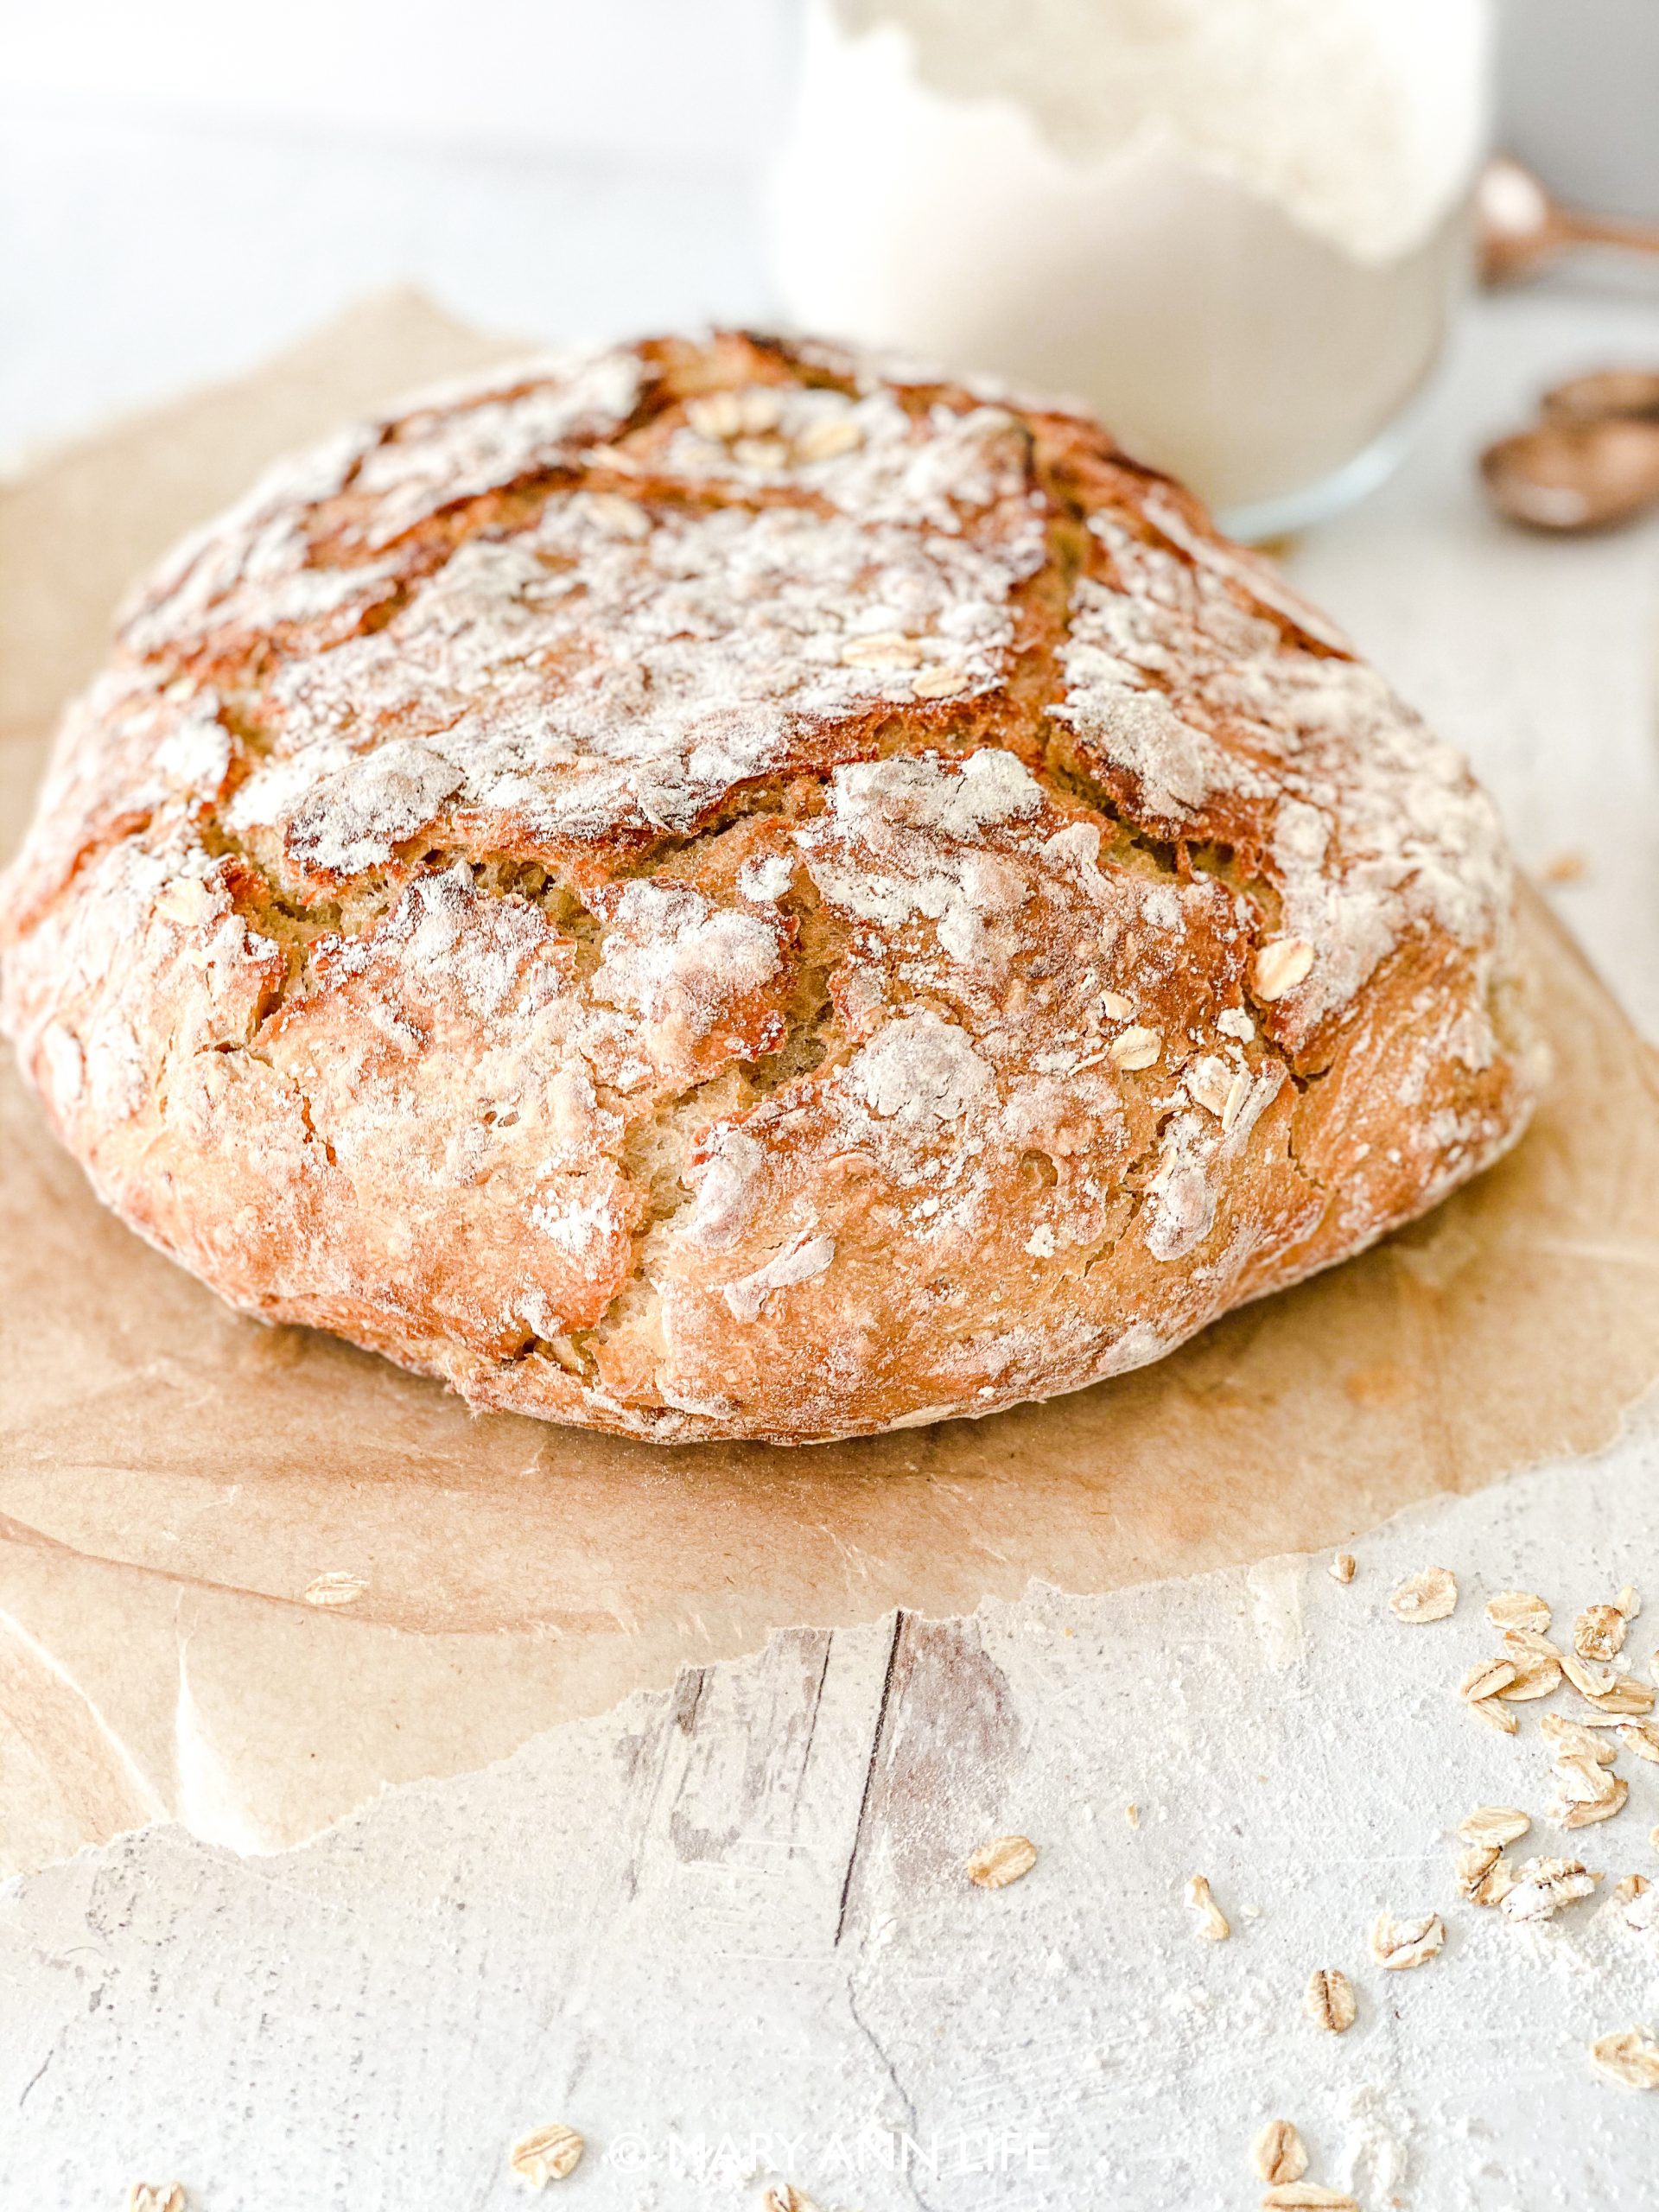


There’s nothing like the smell of homemade artisan bread! Making bread can appear like a daunting task, but with a no-knead method, making this bread is foolproof. The most difficult challenge is waiting at least an hour before slicing and buttering the slices. Keeping the staples in the pantry, such as flour, active yeast, oats, and honey is essential to making the perfect no-knead artisan bread.
Making bread is an art form, and before taking the plunge into the baking world, never had I imagine making a good loaf of bread. Kneading is fun and all, but if a recipe requires to little to none, this recipe will be your new best friend. Don’t be alarm if this turns into a weekly baking ritual. Slice some for sandwiches or if you’re like me, use them to dip in runny yokes for breakfast. Enjoy!


Honey Oat Artisan Bread
Ingredients
- 3 ¾ cups All-Purpose Flour, plus more for dusting
- 2 ¼ tsp Active dry yeast
- 1 cup Oats
- 1 ½ tsp Kosher Salt
- ½ cup Honey
- 2 cups Warm water
Instructions
- In a large bowl, sift the flour and add the oats, and mix with a wooden spoon.

- Measure the yeast and add it to one side of the bowl. So the same to the salt. Stir the yeast into the flour on its side of the bowl first and then stir the salt into the flour on its side of the bowl. This will prevent the salt from mixing directly with the yeast. Mix well until all is incorporated.

- Make sure the water is just above room temperature. If the water is too warm or too cold it can kill the yeast and prevent the bread from rising. Measure the water, add the honey directly to the water and stir to combine.

- Pour the honey and water mixture, and stir with a wooden spoon. The dough will be rough and a bit sticky, but that's a good thing. Stir until all the flour is moistened and well combined. Since this will be a no kneed artisan bread, there's no need to worry about the sticky appearance.

- Cover the bowl with plastic wrap. Use a large bowl to compensate for the rising dough, for it will double in size. I often keep it in the microwave. Place the bowl in a warm, draft-free place and let it rise for 1 ½ hour.

- Place a piece of parchment paper on the counter, and dust with flour. Rub flour on your hands, and scrape the dough away from the sides of the bowl, gathering it in your hands, and forming it into a circular loaf on the parchment paper. The rough places lend to the rustic artisan look of the bread. The goal is to handle the dough as little as possible at this stage to avoid deflation.

- Sprinkle a little bit of flour over the top, along with some oats, and loosely cover it with a clean kitchen towel. The flour prevents the towel from sticking to the dough. Let the dough rise for about 30 minutes.

- Preheat the oven to 450°. Place the dutch oven with the lid on in the cold oven, and let it heat up during the preheat. NOTE ON BLACK DUTCH OVEN: Set the oven to 425° instead of 450°. Remove the preheated pot from the oven, and transfer the dough by holding the wax paper, and insert gently. Place the lid on the pot, and return it to the oven for 30 minutes.

- Avoid open the oven during this time, and certainly not the lid. The crispness of the crust will develop because of the steam that builds in the pot during the 30 minutes. After 30 minutes, remove the lid from the pot and continue baking for an additional 10 minutes. Carefully remove the dutch oven with the bread from the oven, and place the bread on a wire rack. Hear the loaf crackling! It's still cooking so wait at least an hour before digging in, if you can resist!


")


 | Really Personal Podcast")


")

")


+ show Comments
- Hide Comments
add a comment